Listen to the song about her!
 |
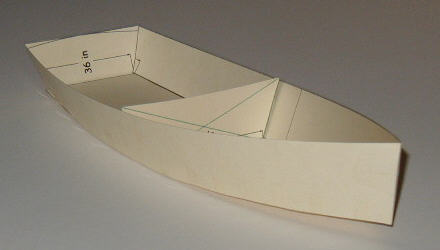
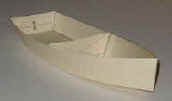
Daydream Prototype
Building Notes |
|
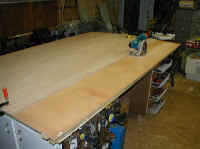 |
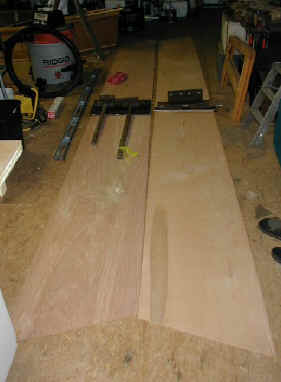
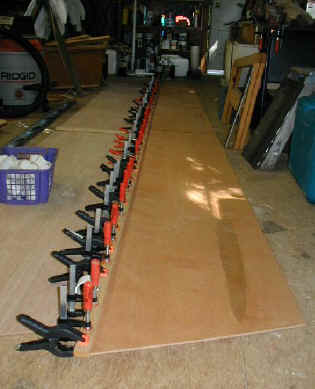
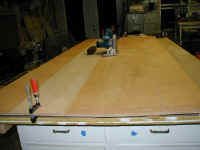
The 2 sheets that make the sides are cut in a stack, good
sides facing each other. The factory edge of a third sheet acts as a saw
guide. 8" is cut off both edges per drawing. |
 |
|
Saw tip for making straight cuts: |
It's good to get to know your circular saw. If you measure
from the edge of your base plate to the oposite edge of your blade teeth
(or measure to a cut kerf) you will always know how far back to clamp you
saw guide to get it to cut in exactly the right place. No line need be
drawn or snapped either. Just "tick" marks on the edges showing
where to clamp your guide strip. A mentor of mine once commented
"Your saw can't see all those pretty pictures you're drawing you
know." Of course curves are a different story... |
 |
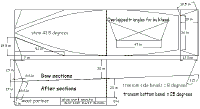
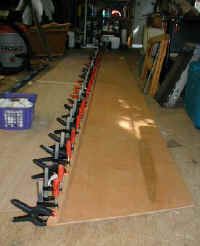
Using one of those 8" strips as a saw guide the angle
cut across the sheets to make the sides taper is cut. |
 |
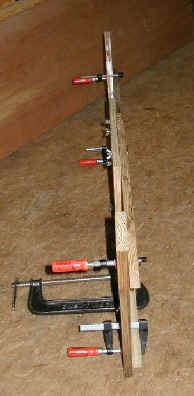
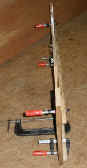
The sides are scarffed with 3" wide 1/4" ply butt
blocks. I used Tightbond II and 1/2" staples as clamps. The a bunch
of weights to make sure. |
 |
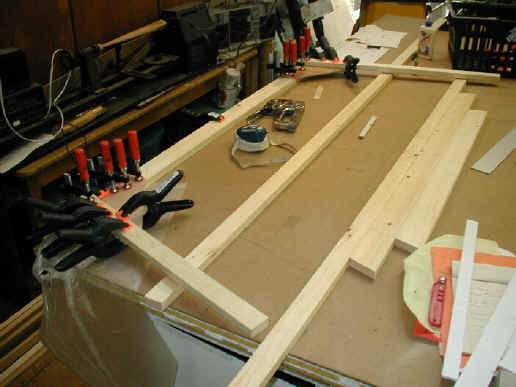
I'm gluing the gunnels, or rub rails, on the sides before
the sides are bent. This is a bit unconventional, but it works. The plan
in groups is to use PL Premium glue and #14 7/8" bronze ring nails.
In this case I'm using Tightbond II without fasteners, and instead putting
almost every clamp I have on them.
I glued the internal chine logs on the same way.
|
 |
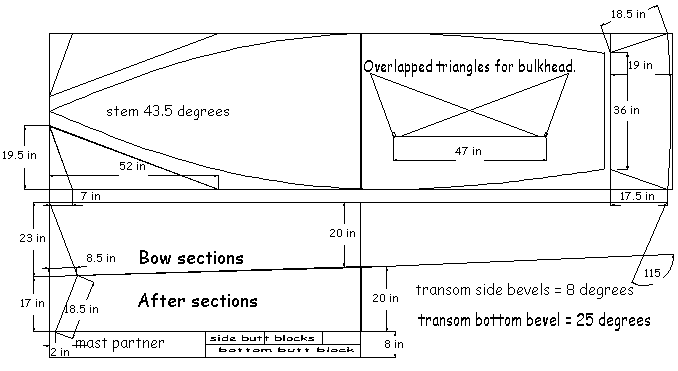
I concluded after feedback from Brian Schmittling that I
would do conventional frames and gussets rather than the overlapping
triangles shown in the drawings. |
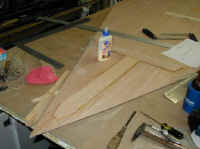 |
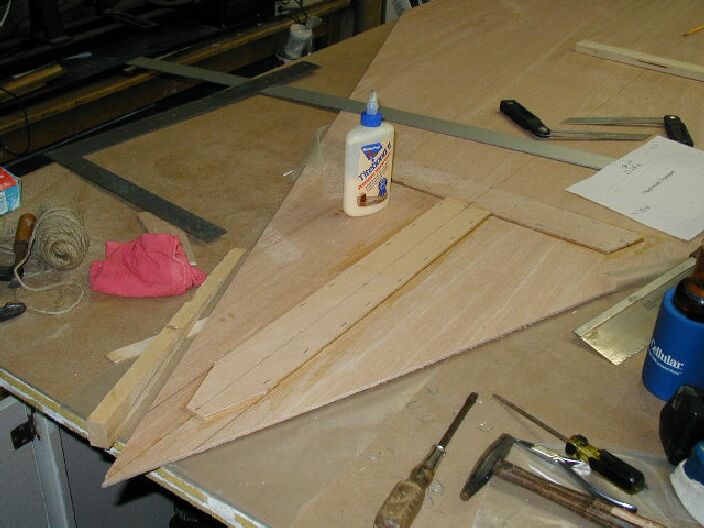
Where those frame triangles were, I did the same "rotating triangles" trick
I used on Summer Breeze. This freed up some more ply to be used in other
ways. I once again used Tightbond II and 1/2" staples for clamps. |
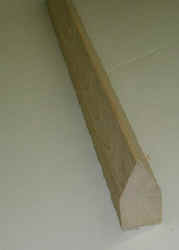 |
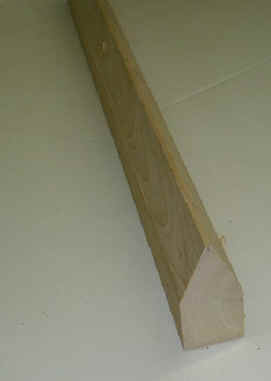
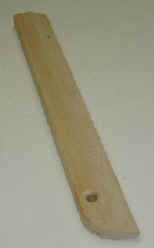
The stem is from a piece of 2x4. In this case cypress.
I left mine beefy so I
could have an old fashioned bit at the bow with a hefty hole for a
painter. (Can anyone tell me why lines tied to boats are called painters?)
|
 |
 |
The stem is dry fit to a side with drywall screws through
little 1/4" ply pads.
|
 |
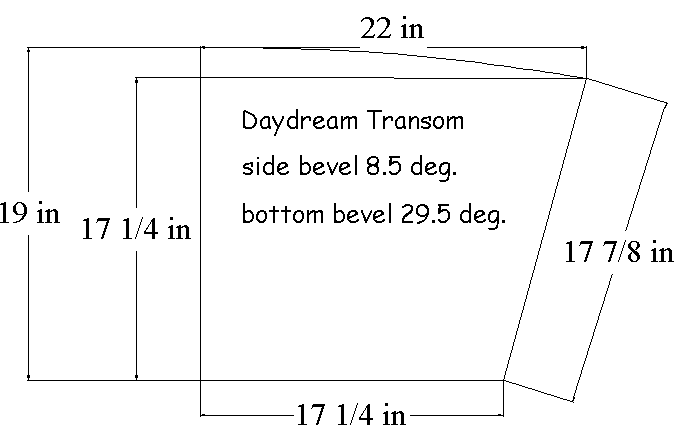
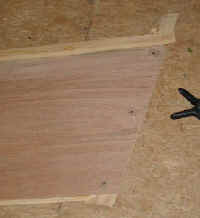
So I glued the frame around the transom.
Now I could have used ring nails again, but I'm trying to get my money's
worth out of all the clamps.
Isn't it great. If you stick with this boat building thing, no one will
ever have to wonder what to buy you for birthdays and holidays ever again!
My kingdom for a clamp!!
|
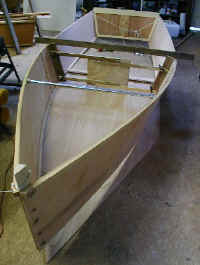 |
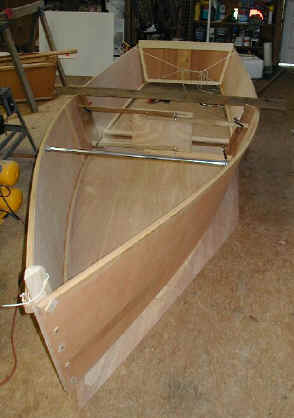
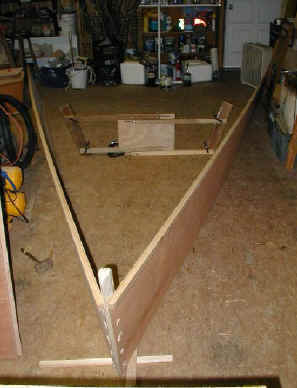
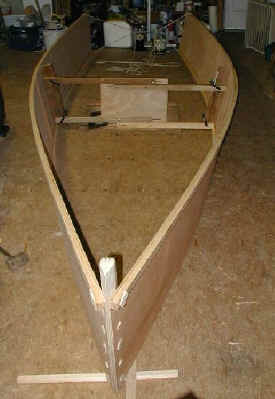
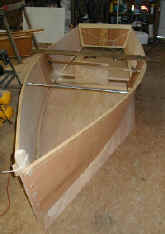
So I've slipped the bottom under her and dry fit her
transom. I also am using a shower curtain rod to act as an adjustable to
spreader, instead of a forward frame at the moment.
NOTE: It's a good practice to temporarily attach a cross piece at the
top of your frame(s) - you can just make the sides long so they "run
wild" above the gunnels and dry wall screw a 1x2 or larger
spreader/brace to them.
|
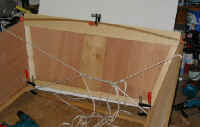 |
With three clamps and a dowel I draw the arch in the transom.
|
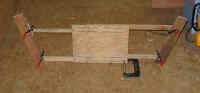 |
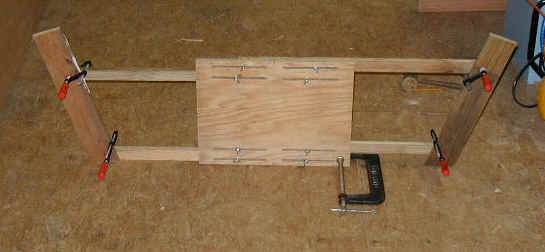
Building Tip:
Indecision is the mother of invention...
This might be more a designing tip, but this frame jig
of a square of plywood with some slots and carriage bolts and wing nuts
allows you to alter the beam and flare of a hull without rebuilding
anything. It works really well. I made it because I was unsure of the
frame dimensions - turns out I left them as I had drawn them - but it is
reusable! |
|
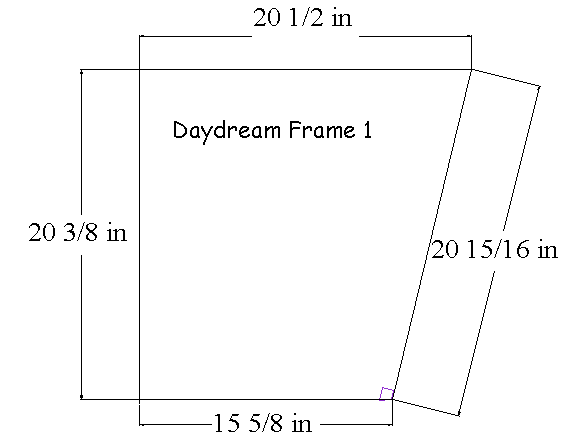
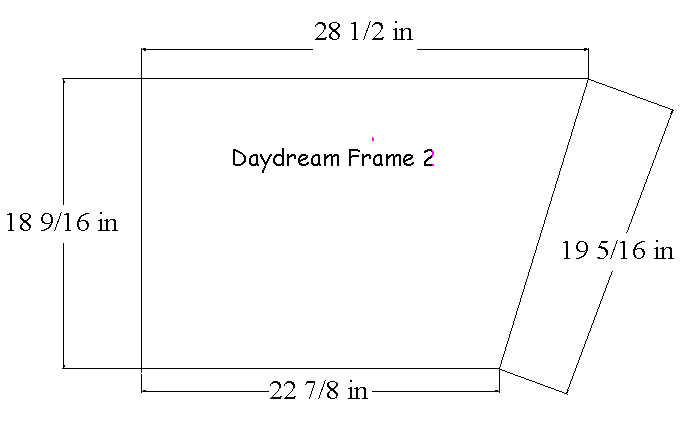
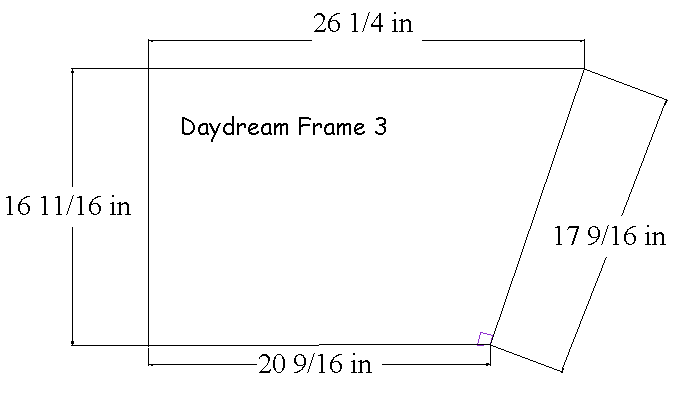
Even though I used the jig above, I would bend the
sides around the middle frame then added frame 1 and 3. I used 1x3s and
ply gussets. They fall 57", 104", and 151.5" from the bow -
measured along center line.
(I'll try to get the measurements for marking the sides while flat, but
for now all I have are the center line positions.) |
| Daydream is on hold for now, as a couple of
other boats call, but I'll keep you posted! |
|
|
Daydream Skiff design copyright
David J. Beede 2002 |
|