Summer Breeze Sails! -
Day Twelve (Oct 29, 2000)Sailing bits, and polytarp sail making.
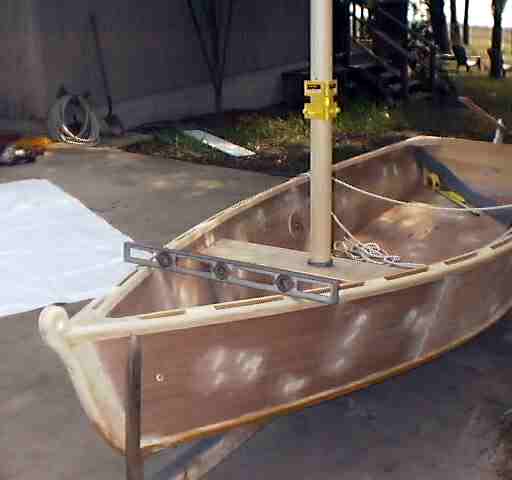
I was determined to get her sail made this weekend, and get her sailing. Though conditions weren't entirely favorable - progress was made. I made the mast partner (seat like board with a hole for the mast to go through) and the blocks to mount it to. I only screwed the partner to the blocks as the final position is still a little questionable. (50" aft of the stem at the moment)
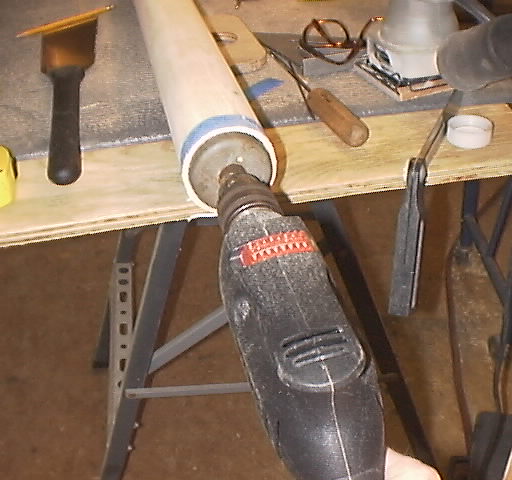
I finished sanding the mast and gave it several coats of water based sealer called Hydroclear by Burgess. I used the same finish on the tiller and it looks and feels great. It's a cinch to apply with a cloth, fast drying. We'll see how it holds up. I also have some Hydroguard they tint for UV protection but the color was a bit orange-ish for my taste.

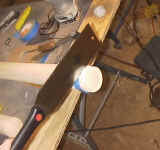
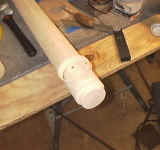
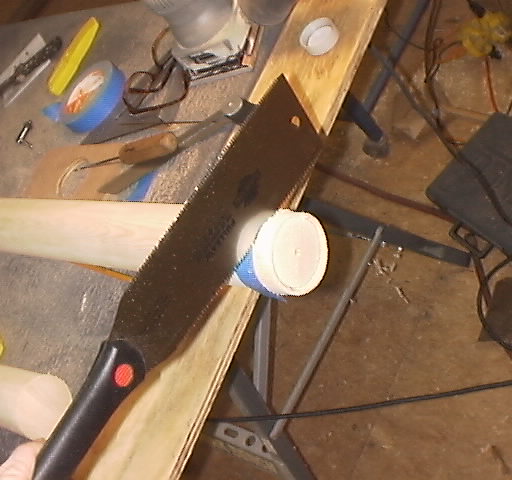
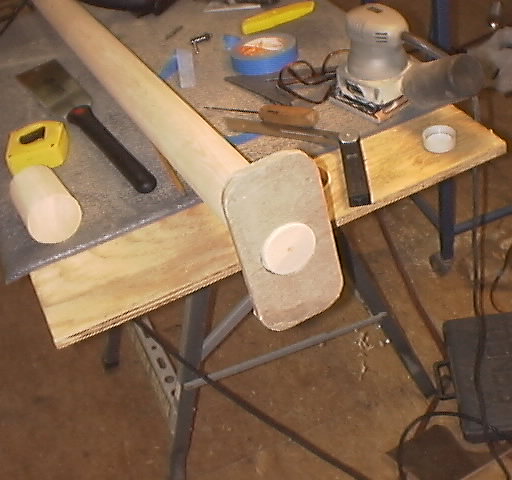
I used the same hole saw that I made my mast step with, to size the base of the mast. After drilling into the center of the base I used tape to guide my saw around the perimeter. A tidy ring of wood popped off and the mast now fits the mast step perfectly!
On the trailer on my concrete slab I was able to level up the boat. Since she's designed for the transom and the stem base to touch the water fully loaded I tilted the trailer until they were equal distance from the ground. Some cedar shims made her level side to side. Then I used a handy post leveler to get the mast vertical. (I actually let her rake aft very slightly.) I then marked the mast step position and screwed her to the bottom, into the keel.
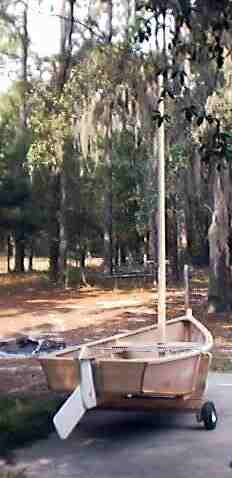
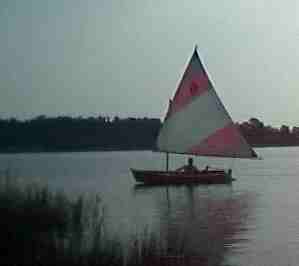
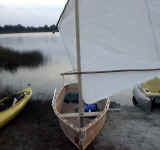
At this point I realized I didn't have a large enough piece of polytarp to make her sail, so I popped our sunfish sail on her for fun.
The mast step was not properly positioned for this rig so she looks sort of goofy. There wasn't as much weather helm (boat trying to turn up into the wind) as I'd guessed there'd be. But in just minutes the wind died and the lake got glassy smooth. I got to sail enough to see the rudder and leeboard seemed to function well.
The main sheet hole I put in the tiller works great. Jim Michalak recommends a fairlead on the tiller near the pivot point so you can control the sheet and tiller with one hand. While making a wooden fairlead I realized I could just put a hole in the tiller instead. It's positioned such that I can pinch the sheet between the tiller and the rudder head's stop ledge. You can either hold the sheet against the till handle or pinch it by keeping the tiller pressed down. A lift of the tiller lets the sheet run free. The nylon strap hinge is also working fine. It stays in place and removes with a small tap on the bottom of the wedge. My only complaint is the the sheet can wrap around the rudder head when coming about. Which in a blow could have you momentarily without sail or rudder control.... hmmm... I'll have to ponder that one.
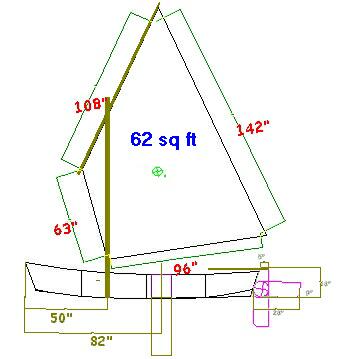
The Sunfish rig gave me the feeling that my 72 ft sail might be overkill for this boat, so I redrew her in a 60 ft size, which now happens to fit my 10'x12' poly tarp. So, back to sail making...
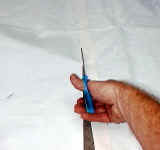
Here's the sketch with side lengths. Another confession here. My test of hot melt glue for the seams didn't work well enough to trust it, and I had a small amount of double stick tape left so I made use of 2 factory edges of the tarp- the foot and the luff. (the bottom and the leading edge.) I think polytarp Dave recommends against it, but I couldn't resist. I even was able to make use of 3 factory grommets. We'll see how she works.
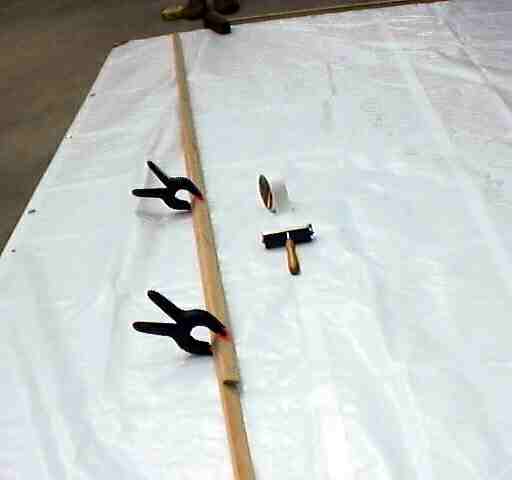
I marked the length of the sail's sides on wood strips and then did a trial layout.
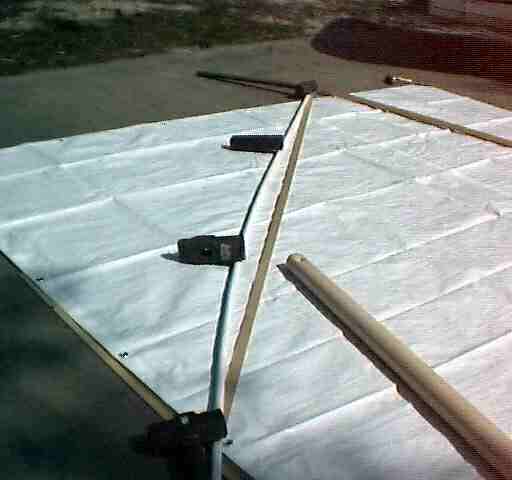
I use 3/4" PVC pipe to layout the curves of the sail edges. Here I'm drawing the shape of the head or top edge of the sail. This edge will be attached to the bamboo spar by rings or ties. I held the pipe in position with weights then traced its curve lightly. (Head or top of the sail curves out about 3 inches and the leech or trailing edge of the sail curves in about 2 inches.) If she needs more shape I'll try the little edge pleats that Dave Gray uses. As you might suspect, I try simpler first and get complicated only if necessary;-)
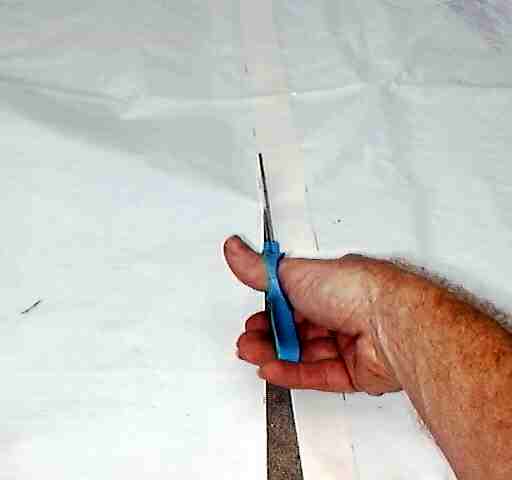
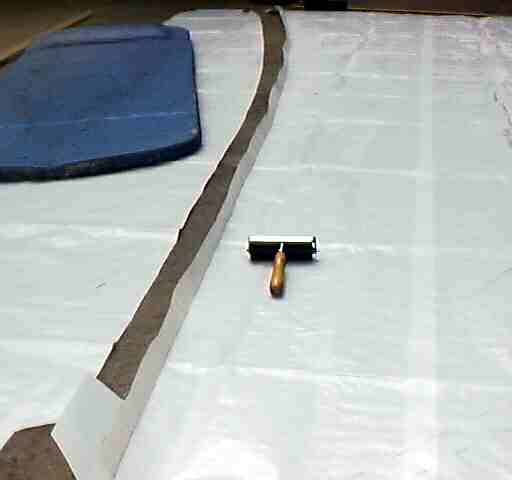
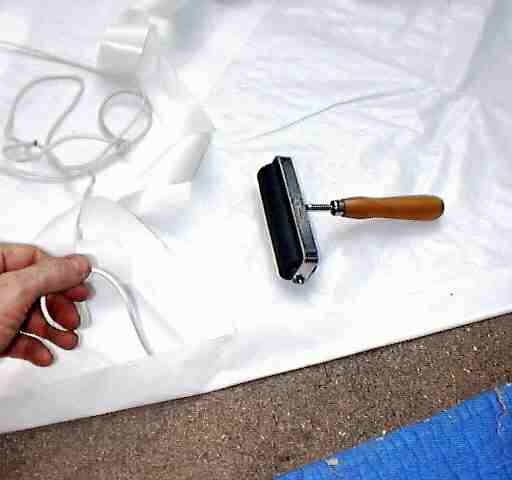
After tracing the pipe, I apply double stick fiberglass reinforced carpet tape on the outside of the line. An artist brayer (small rubber roller) is helpful in firmly applying the tape.
I then cut along the outer edge of the tape. (A foam pad or knee pads is handy for this part. You'll do a lot of crawling around.)
I use the brayer again to form a crease along the inner edge of the tape.
Then, a few inches at the time the backing is peeled and the tape is rolled tight.
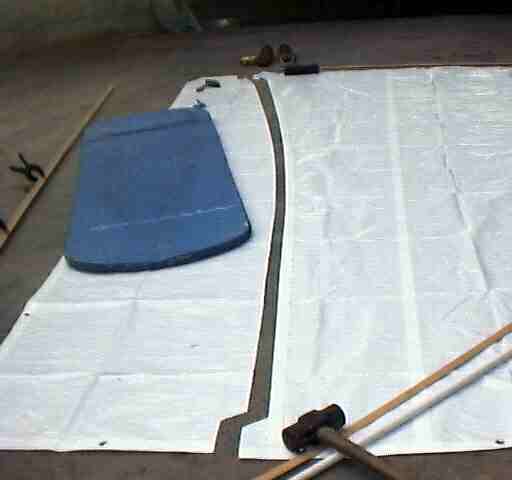
Along the head of the sail I placed 1/8" Dacron bolt rope to help take up some of the stress and also keep the sail rings from pulling through. Some put bolt rope around the whole sail, but I've been told the smoother the air flow over the leading and trailing edges of the sail the better. Besides that fiberglass reinforced tape lends amazing stretch resistance to the sail material.
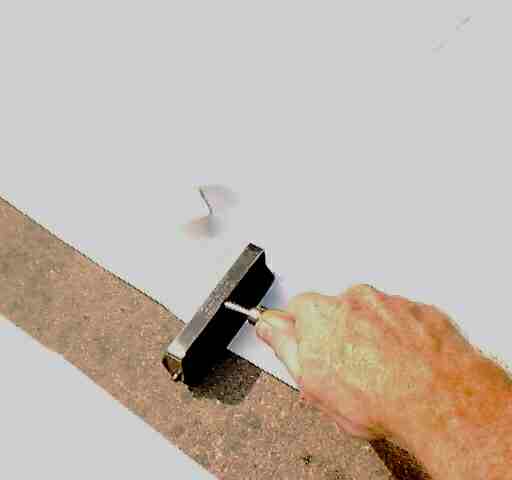
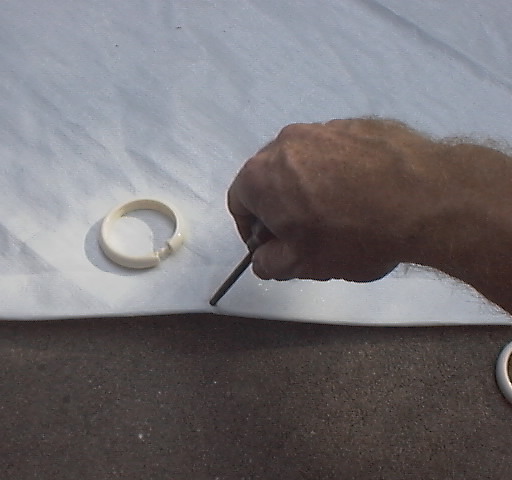
I have previously melted through the sail just inside the bolt rope with my soldering iron, but this time I used the tip of my glue gun to melt it slightly, followed by an awl. These rings are actually sold for shower curtains. (OK, don't laugh, they work!) I don't know how they'll handle UV exposure. Short lengths of cord work fine too. Though I couldn't make hot melt glue work for the seams, it seemed to work fine for the corner reinforcements, and tacking down loose. corners.
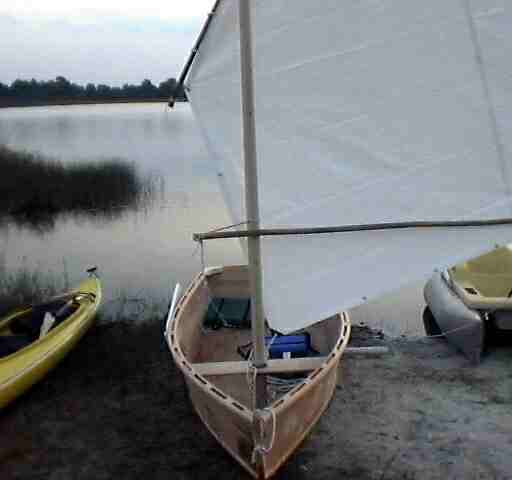
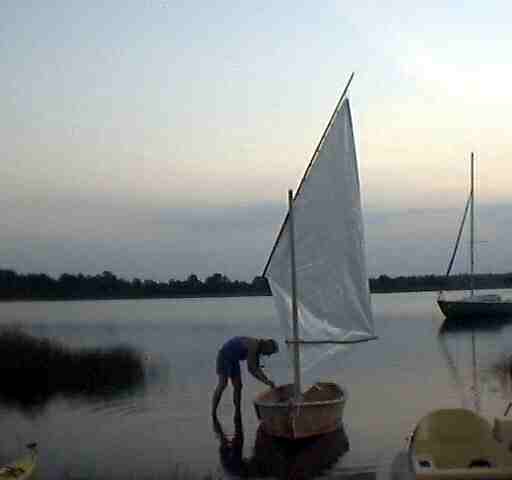
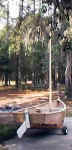
Bamboo spar or yard (the stick at the top of the sail) and sprit boom (the one tied to the mast and holding the clew/outer corner of the sail) and she's on the boat! My bamboo comes from a neighbors patch. It's amazingly strong and light, but hard to find truly straight pieces.
In spite of no wind I'm determined to sail.
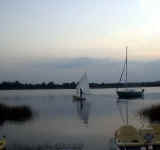
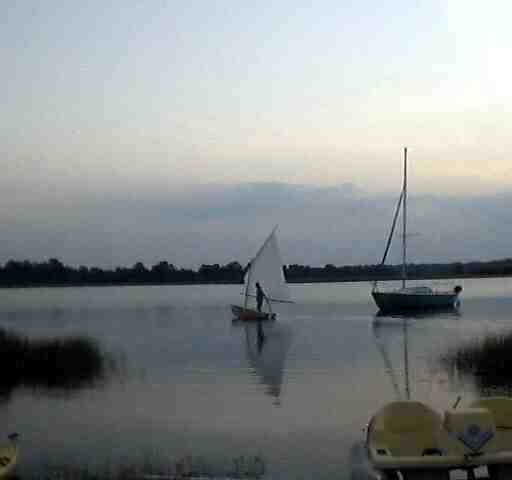
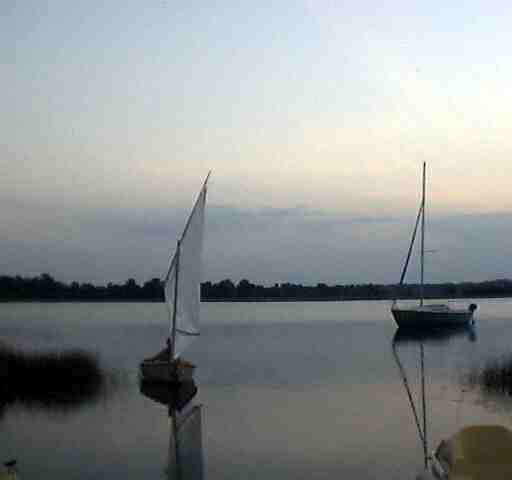
So we went out.
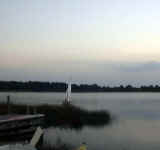
We came back. Does this count as a sail? Not blowing hard enough to really see how the sail fills, but it definitely moves the boat in air so light it felt theoretical!
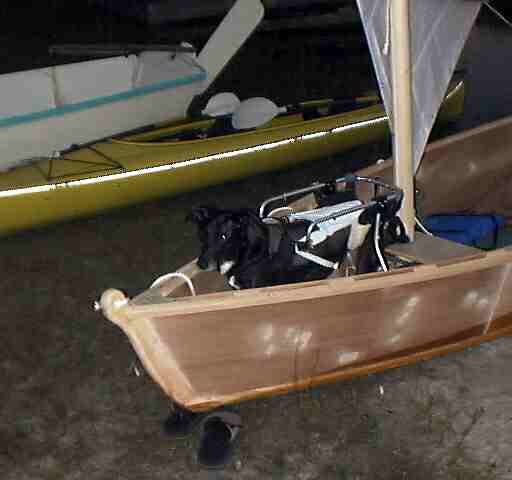
And I'm happy to report that our pooch Kayla fits in the bow in her cart. Maybe tomorrow there will be enough wind to really sail her.
Then I'll go back and finish sanding and painting her, I promise....
Speaking of promising, I realize all this information is rather disjointed, so I promise when I finish Summer Breeze, I'll complete the drawings and organize the build info by boat parts instead of chronologically. It will be much more accessible then. Thanks for your patience.
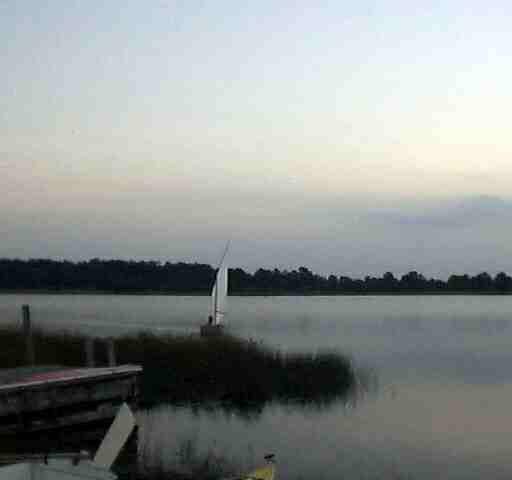
Summer Breeze waits for an Autumn breeze.
Day Thirteen...