Lead Pouring - sink weights in leeboard and rudder
So far I've counted on friction to get my leeboard and
rudder blade to behave, it works OK, but not as I would like. I've
decided to try adding lead weights to create negative buoyancy. If all
goes well the boards will kick up in shallow water but sink back into
position in deeper water. I will probably add some glass and epoxy to
their leading edge to handle the impacts.
First a word about safety.Be VERY CAREFUL working with lead. It is poisonous and molten lead is 770 degrees F. so use common sense. Make your set up in a well ventilated area - outdoors if possible. Don't let children or animals be around. Make sure your heat source and your melt pot can't get knocked over. Don't use your utensils for anything but lead. Make absolutely sure there is no water in your lead or in the mold cavity. Water will boil instantly in molten lead and spray it everywhere. Ware protective clothing, eye protection and, to be absolutely safe if there is any question of ventilation - a respirator. Wash hands thoroughly after working with lead. All that said, here's how I went about it. |
 |
Jim Michalak has great information about weighting boards.
Here's a link to his article on the process. Michalak
on Rudders.
For info on using wheel weights check this page out. First you calculate the area of the lead, then the weight. I made paper patterns of the cavity then drilled and cut it out with my sawzall. |
| Here's an excerpt from Jim's article that deals with
the calculations of area and weight.
SINK WEIGHT... "I called this the "counterweight" in the drawing but "sink weight" is a better term. The sink weight should be slightly heavier than the buoyancy of the immersed blade. Wood is about half as dense as water, and lead is about 11 times denser than water. It works out that the area of the lead weight should be about 1/16th the area of the immersed blade, or maybe 7 percent of the area to give a slight negative buoyancy. For example, a blade that is 10 inches by 15 inches immersed is 150 square inches. The lead weight could be 150 x .07 = 10.5 square inches, which would be a square 3.24 inches per side. Cut a hole in the blade for the lead to the proper size, preferably toward the tip and toward the trailing edge. Bevel the hole's edges so the lead will lock in place by forming flanges around the blade. Also place some rustproof nails or screws around the interior of the hole to further lock the lead in place. Clamp the blade to a flat metal plate and place it level on the floor. To figure the weight of the lead required, multiply the area in inches by the thickness in inches and again by .4. In the example, if the example blade is 3/4" thick, the weight of the lead required is 10.5 x .7 x .4 = 3.15 pounds." Here's Jim's Home Page. http://homepages.apci.net/~michalak/ Keep your eyes open for his book that's in the works.
|
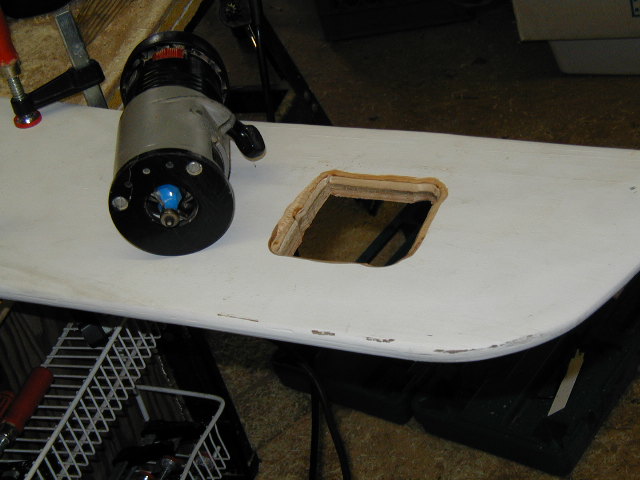 |
After cutting the opening I use a router with a round over bit to champher the egdges of the cavity. This helps the lead stay in place. |
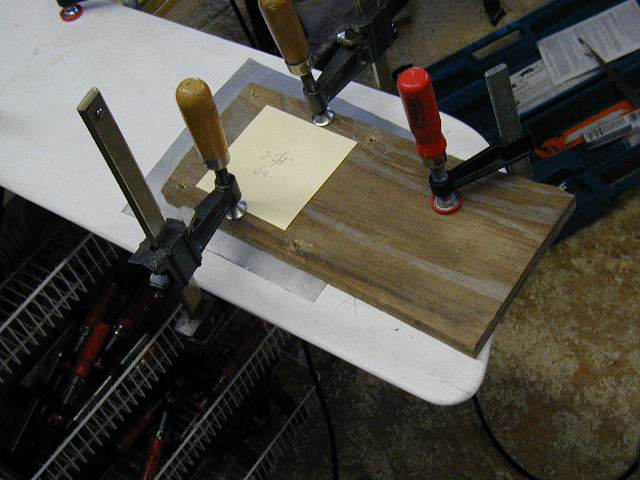 |
Jim clamps his board to a steel plate, but I don't have one. So I used some roof flashing backed up by a piece of plywood screwed tight with drywall screws. |
 |
Here it is with the board screwed down tight. |
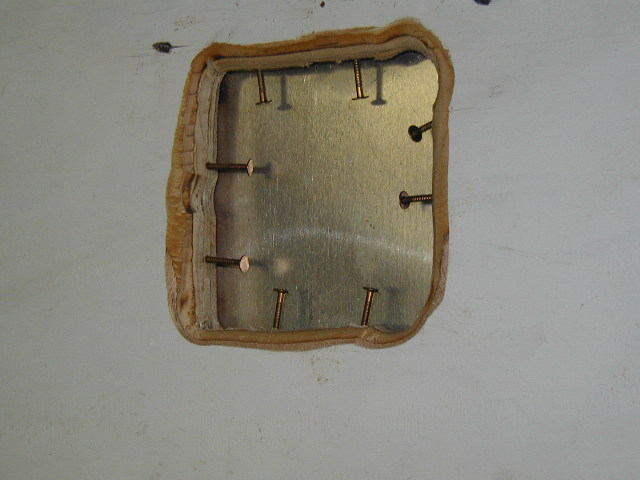 |
Bronze ring nails or screws are used around the edge of the cavity to give the lead more to hold on to. |
 |
I used a tin can for the melt pot and an 1100 watt hot plate as the heat source. I rigged a handle from 1/4" steel rod and plumbers strap. I also attached some plumbers strap around the base to make pouring easier. I doing the pour outside for safety and ventilation. A fan is blowing out of the picture and the fire extinguisher is at the ready. I leveled the rudder in the sand with wedges. |
 |
I use a mirror to look down into the can to check the progress of the melt. I'm using a 6 pound diving weight, and I'm a little concerned the solid mass of the piece will prevent me getting it to 770 degrees in a decent time. |
 |
Eventually the lump melts and the pour goes pretty smoothly. Even though its a hot Florida summer I put on long jeans, and a long shirt, goggles and a mask and oven mits for the actual pour. |
 |
I let the pour stand "proud" of the cavity anticipating it shrinking as it cools. This turned into a bit of a problem as I didn't know how to get the raised lead off. Jim said he carefully uses a very course grinder so the bits are large and not airborne. I ended up taking the suggestion of Bill Jaine on the boat design list - which was to heat it with a torch until it went "plastic" then scrape it off level. That worked fine. |
 |
The pour for the leeboard involved twice as much lead, almost 12 lbs. The little hot plate turned out not to be up for the job so I switched to a propane camp stove. It worked amazingly well. Notice I didn't put that can of molten lead on that tall stove without added support. In spite of all the suggestions to use a cast iron pot for the job, I found this large metal can worked fine. I drilled below the rim for a 1/4" metal rod which holds a "bucket bail" made of plumbers strap. I also used plumbers strap to make a tilt control handle for the pour. It worked great - I actually lifted the can with the claw of a framing hammer and tilted it with strap handle. Jim M. suggests a 1/2" hole in the side of the can to pour through as this keeps back the metal clips if you used tire weights as your lead source. Having no clips I just poured over the edge of the can. |
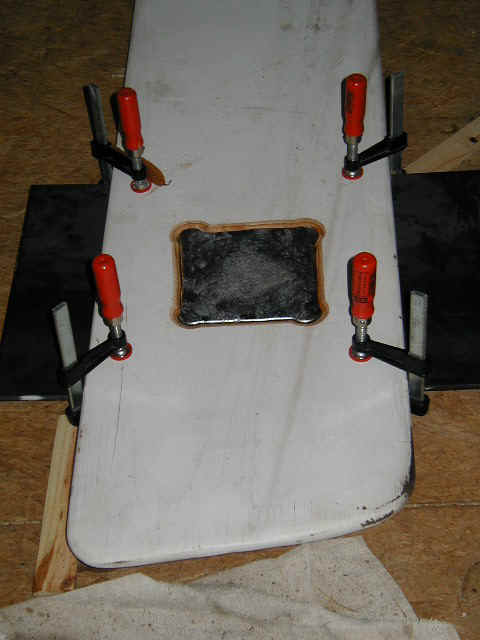 |
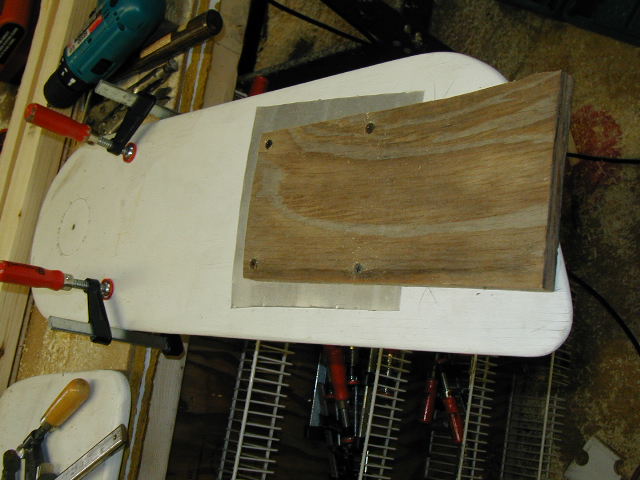
I prepared the cavity the same as for the rudder, but I was careful not to overfill this time. You'll notice I also went to a welding shop and got a metal plate like Jim M. suggests. It worked much better. The flashing I used as the back up on the rudder blade actually went concave, into the cavity, during the pour which may have added to the problem of it being too high on the other side. Anyway - this steel plate resulted in it being dead flat on the underside. |
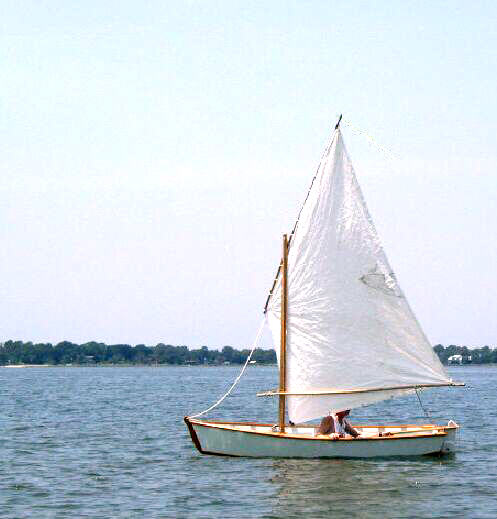 |
I have no more pictures of the process, so here's one of the
end result! Overall it was a grand success. I filled the boards with bondo,
sanded and painted them. When their lines are release the boards pivot
smoothly down into position. If we hit bottom they pivot up. As we get
back in deeper water, they pivot down again. Just like magic!
What would I do different? For one, I wont make any more 1" thick boards for small boats again. It's overkill, and the doubling of the lead weight is significant. The leeboard and rudder assemblies all by themselves weight almost 30 lbs... ouch! This on a 60 to 70 lb hull is a little crazy. A couple of those slick plastic "clam cleats" they sell at West Marine and the like would work great to set the depth of the blades.
|
David Beede simplicityboats
Back to Simplicity Boats Home page.